It was fun to to follow Abduzeedo tutorial for making bokeh digital effect in Photoshop (i'm using photoshop and gimp) and i really excited when i managed to do similiar effect in Gimp. So i decided to make a Gimp tut for this one..it's been over a months since my last tutorial and i think after this i'll make more Gimp tuts..Click More Inside The Post to read the tutorial.

P/s: This tutorial has been converted from the original Photoshop tutorial into Gimp. The original Photoshop tutorial can be found HERE in Abduzeedo site.
Before you try this tutorial,please download my Eclipse brush where i made it by myself. You can download the brush by click HERE. After download it, paste the brush to Gimp folder. And i'm using Gimp 2.6 for this one.
P/S : Click the image for larger view.
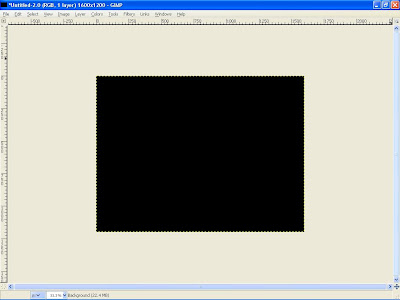
Create new document. I'll used 1600 x 1200. Fill the background with blackcolour .
Then create new layer.I renamed it as dark violet.

Choose a dark purple. I'm using #b10993.

Select gradient tool, Radial for the shape and low the opacity to 50. Click the image for larger view.


Now create a new layer and i renamed it as eclipse.

Select the brush tool. and I'll using my Eclipse brush. Use white color for the brush.Then Select brush dynamic options and for the values use the image below.

Now we'll paint some ellipses at the eclipse layer.

Go to Filters>Blur>Gaussian Blur. For this first layer use 40 pixels for the Horizontal and 40 pixels for the Vertical.


Create another layer ( I named it eclipse 2 ) and start painting again.

Go to Filters>Blur>Gaussian Blur. For this second layer use 10 pixels for the Horizontal and 10 pixels for the Vertical


Create another layer and repeat the previous step, this time however i'll Apply the Gaussian Blur to this layer as well, but use only 1 pixel for the Radius.

And then create a new layer and i named it as Clouds.Fill it with white. Go to Render>Clouds>Different Clouds.and apply to the layer. I use 4 for the Detail, Randomize and Tileable.After that changes the layer mod to Overlay.


Create another layer and named it gradient.

Using the gardient tools select Full Saturation Spectrum Gradient , 100 for the opacity and Linear for the shape.

Apply the gradient to the layer. Change the layer mod to Overlay.U'll see a nice effect there.

Go to layer eclipse 3 and change the layer mod to Grain merge.

Last,go to layer 2 and change the layer mod to Hard Light

Finish!

Result

Below is my result using Photoshop..You will noticed that Gimp is a great free editing software ever because it can achieve almost the same as Photoshop result.

hope u like it..i take no credit of this awesome effect.credit all to Fabio Sasso for the inspiring idea.
I also included the Xcf file.
Click here to download the Xcf file used for this tutorial
UPDATED: 2 FEBRUARY 2009
I HAVE MADE NEW BOKEH .GBR BRUSH SO FEEL FREE TO DOWNLOAD IT HERE. THIS IS MY NEW RESULT USING THE BRUSH. MADE IN GIMP 2.6.4.


P/s: This tutorial has been converted from the original Photoshop tutorial into Gimp. The original Photoshop tutorial can be found HERE in Abduzeedo site.
Before you try this tutorial,please download my Eclipse brush where i made it by myself. You can download the brush by click HERE. After download it, paste the brush to Gimp folder. And i'm using Gimp 2.6 for this one.
P/S : Click the image for larger view.
Create new document. I'll used 1600 x 1200. Fill the background with blackcolour .

Then create new layer.I renamed it as dark violet.

Choose a dark purple. I'm using #b10993.

Select gradient tool, Radial for the shape and low the opacity to 50. Click the image for larger view.


Now create a new layer and i renamed it as eclipse.

Select the brush tool. and I'll using my Eclipse brush. Use white color for the brush.Then Select brush dynamic options and for the values use the image below.

Now we'll paint some ellipses at the eclipse layer.

Go to Filters>Blur>Gaussian Blur. For this first layer use 40 pixels for the Horizontal and 40 pixels for the Vertical.


Create another layer ( I named it eclipse 2 ) and start painting again.

Go to Filters>Blur>Gaussian Blur. For this second layer use 10 pixels for the Horizontal and 10 pixels for the Vertical


Create another layer and repeat the previous step, this time however i'll Apply the Gaussian Blur to this layer as well, but use only 1 pixel for the Radius.

And then create a new layer and i named it as Clouds.Fill it with white. Go to Render>Clouds>Different Clouds.and apply to the layer. I use 4 for the Detail, Randomize and Tileable.After that changes the layer mod to Overlay.


Create another layer and named it gradient.

Using the gardient tools select Full Saturation Spectrum Gradient , 100 for the opacity and Linear for the shape.

Apply the gradient to the layer. Change the layer mod to Overlay.U'll see a nice effect there.

Go to layer eclipse 3 and change the layer mod to Grain merge.

Last,go to layer 2 and change the layer mod to Hard Light

Finish!

Result

Below is my result using Photoshop..You will noticed that Gimp is a great free editing software ever because it can achieve almost the same as Photoshop result.

hope u like it..i take no credit of this awesome effect.credit all to Fabio Sasso for the inspiring idea.
I also included the Xcf file.
Click here to download the Xcf file used for this tutorial
UPDATED: 2 FEBRUARY 2009
I HAVE MADE NEW BOKEH .GBR BRUSH SO FEEL FREE TO DOWNLOAD IT HERE. THIS IS MY NEW RESULT USING THE BRUSH. MADE IN GIMP 2.6.4.
Nessun commento:
Posta un commento